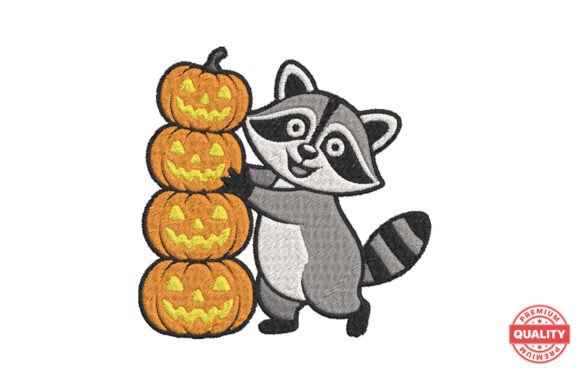
Cute Raccoon with Pumpkins: Elevating Your Embroidery Projects with Precision
There is a distinct charm in combining whimsical character art with seasonal motifs, and the Cute Raccoon with Pumpkins design captures this balance perfectly. For crafters looking to add personality to their work, this motif offers more than just aesthetic appeal; it provides a versatile foundation for various textile applications. However, the difference between a professional-looking finished product and a tangled mess often lies not in the quality of the design itself, but in how it is prepared, stabilized, and stitched. Many enthusiasts rush into purchasing and stitching digital files without considering the technical nuances that ensure longevity and visual clarity.
Understanding the intricacies of machine embroidery can save you time, thread, and frustration. This guide explores common pitfalls associated with using character-based designs like this raccoon motif and offers practical strategies to achieve superior results on t-shirts, tote bags, and decorative fabrics.
Overlooking File Format Compatibility
One of the most frequent errors beginners make is assuming that all embroidery machines read the same file types. A design labeled as "universal" often requires specific conversion or selection from a multi-format pack. The Cute Raccoon with Pumpkins design typically comes in multiple formats to accommodate brands like Brother, Janome, Husqvarna, and Bernina. Ignoring this detail can lead to error messages, distorted patterns, or even machine jams.
The Fix: Always verify your machine’s native file format before transferring the design. If your machine uses a proprietary format, ensure you are selecting the correct file extension from the download package. Do not rely on third-party converters unless absolutely necessary, as they can alter stitch density and pathing, potentially compromising the integrity of the raccoon’s facial details or the pumpkin textures.
Neglecting Proper Stabilization
Character designs with fine details, such as the eyes and fur texture of a raccoon, require robust support. A common misconception is that any stabilizer will do for cotton t-shirts or canvas totes. Using a tear-away stabilizer on stretchy knit fabrics, for example, can cause the design to pucker or shift during washing. Conversely, using a heavy cut-away on a delicate decorative piece might make the fabric stiff and uncomfortable.
- For T-Shirts: Use a medium-weight cut-away stabilizer to prevent stretching and maintain shape over time.
- For Tote Bags: A tear-away stabilizer is often sufficient for woven canvas, but hooping tightly is crucial to prevent shifting.
- For Decorative Fabric: Consider water-soluble stabilizers if you want no residue on the back of lightweight materials.
Failing to match the stabilizer to the fabric type results in poor stitch registration. The pumpkins may appear oval instead of round, and the raccoon’s expression could look skewed. Always test your stabilization method on a scrap piece of the same fabric before committing to the final project.
Ignoring Stitch Density and Fabric Weight
Digital designs are created with a specific stitch count and density. When applying the Cute Raccoon with Pumpkins to heavy denim versus lightweight linen, the outcome varies significantly. Beginners often overlook the need to adjust tension or choose appropriate thread weights. Using standard polyester thread on a dense design can create bulk, causing the fabric to pucker around the edges of the pumpkins.
Better Approach: If stitching on heavier fabrics, consider using a top-stitching needle and slightly reducing the tension if your machine allows. For lighter fabrics, ensure the design isn’t too dense for the material to handle. If the design feels too stiff after stitching, it may be due to excessive density relative to the fabric weight. In such cases, using a lighter thread or adjusting the underlay stitches in your software (if editable) can help.
Skipping the Test Stitch
It is tempting to load the hoop and start stitching immediately, especially with an easy-to-use design. However, skipping a test stitch on a similar fabric scrap is a risky gamble. Thread colors may look different on screen than in reality, and the scale of the raccoon might be larger or smaller than expected once stitched out.
A test stitch allows you to check:
- Color harmony between the raccoon’s gray tones and the orange pumpkins.
- Registration accuracy, ensuring no gaps or overlaps in complex areas.
- Thread breakage points, which might indicate tension issues.
This small step prevents wasted materials and ensures the final product meets your quality standards. It also helps you determine if the design size fits your intended application, such as a pocket on a shirt or the center of a tote bag.
Misjudging Hoop Size and Placement
Even if the design fits within your hoop dimensions, placement matters. Centering the Cute Raccoon with Pumpkins incorrectly can lead to awkward compositions, especially on garments. For instance, placing the design too low on a t-shirt can make it look droopy, while positioning it too high might interfere with the neckline.
Use marking tools or temporary adhesive sprays to position the design accurately. Measure twice before hooping. Remember that the hoop should hold the fabric taut but not stretched. Stretching the fabric in the hoop can cause distortion once the item is removed, making the raccoon appear wider or shorter than intended.
Choosing the Right Thread Quality
Not all threads are created equal. Cheap threads may fray, break, or fade after washing, diminishing the vibrancy of the pumpkin oranges and the subtle grays of the raccoon. Investing in high-quality rayon or polyester embroidery thread ensures colorfastness and sheen. Rayon offers a luxurious shine ideal for decorative pieces, while polyester provides durability for items like tote bags that undergo frequent use and washing.
Additionally, match your bobbin thread to the top thread or use a pre-wound bobbin designed for embroidery. Mismatched tensions between top and bobbin threads can cause looping on the back, which may show through on lighter fabrics.
Final Checks Before You Stitch
Before pressing start, take a moment to review your setup. Ensure the needle is sharp and appropriate for the fabric type. A dull needle can cause skipped stitches or fabric damage. Clean your machine’s lint buildup to ensure smooth operation. Verify that the design file has been transferred correctly and appears as expected on your machine’s screen.
By paying attention to these details, you transform a simple digital file into a high-quality embroidered piece. The Cute Raccoon with Pumpkins design is versatile and charming, but its success depends on your preparation. Avoiding these common mistakes ensures that your crafting projects reflect professionalism and care, whether you are creating gifts, selling products, or decorating your home.
Remember, embroidery is a blend of art and engineering. Respect the technical requirements, and the creative results will follow. With the right approach, this design can become a staple in your portfolio, delighting viewers with its playful personality and precise execution.